XWeaver
The AspectX Editor provides a graphical way of editing an AspectX aspect. It consists of a Tree Editor and a corresponding Properties View. The Properties View is the standard eclipse property view and is shown in its own view. The user has to explicitly make the property view available in the eclipse workbench.

Figure 1:
There are two ways you can make the property view available.
It's a good idea to drag the Properties View to its own workbench location. In the following screen shot the properties view has been moved to the bottom left corner. This prevents the view from disappearing if another view is turned active (e.g: the Console)
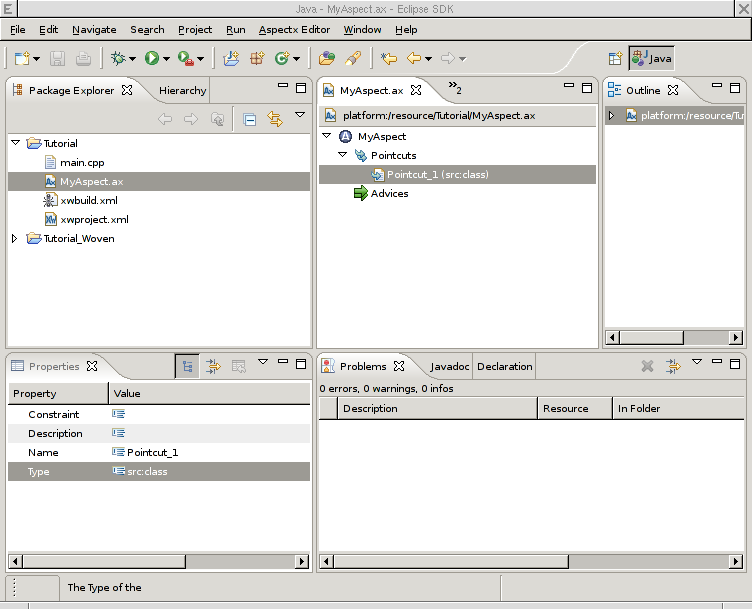
Figure 2: The Properties View moved to its own location.
The Tree Editor enables adding, removing and rearranging parts of an aspect. This can either be accomplished by the context menu or by Drag & Drop . For some actions you may use keyboard shortcuts (e.g. the "Delete" key). Copy/Paste is also fully supported.
The editor continuously validates aspects for correctness. Incorrect elements are highlighted by a red marker icon. To recieve more information to the validation status open the eclipse Problems view as follows: From the menu bar, select Window > Show View > Problems
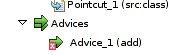
Figure 3: Validation status is continuously shown by annotating incorrect/incomplete tree elements
The properties editor should be straightforward to use. In the same way as in the Tree Editor, properties are marked with a red cross icon if they are incorrect.
For a few properties an extra helper dialog is displayed for editing the content. Press the empty button on the right to open the dialog for a property:
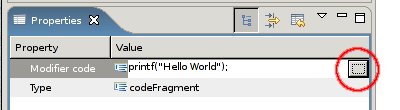
Figure 4: Press the button to open extra input dialog
For editing code modifier contents a special dialog is used which has a XML/XSL Input Mode check box. If checked the dialog text fields needs to correct XML. This is needed if the code modifier should contain xsl code. The prefix for XSLT code must be xsl.
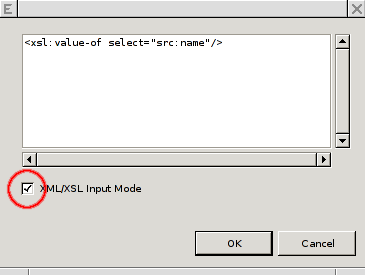
Figure 5: If the XML/XSL input is checked the text is handled XML